Showing posts with label cupcakes. Show all posts

Monday, May 16, 2011

Hey there, little lady(bug)!


Ever since I bought the Martha Stewart Cupcakes book; I've been dreaming of making these little ladybug cupcakes.

For the cupcakes, I decided to go with chocolate instead of vanilla, though, thinking it looked more like dirt.  Don't we all want our cupcakes to look like dirt? ;)

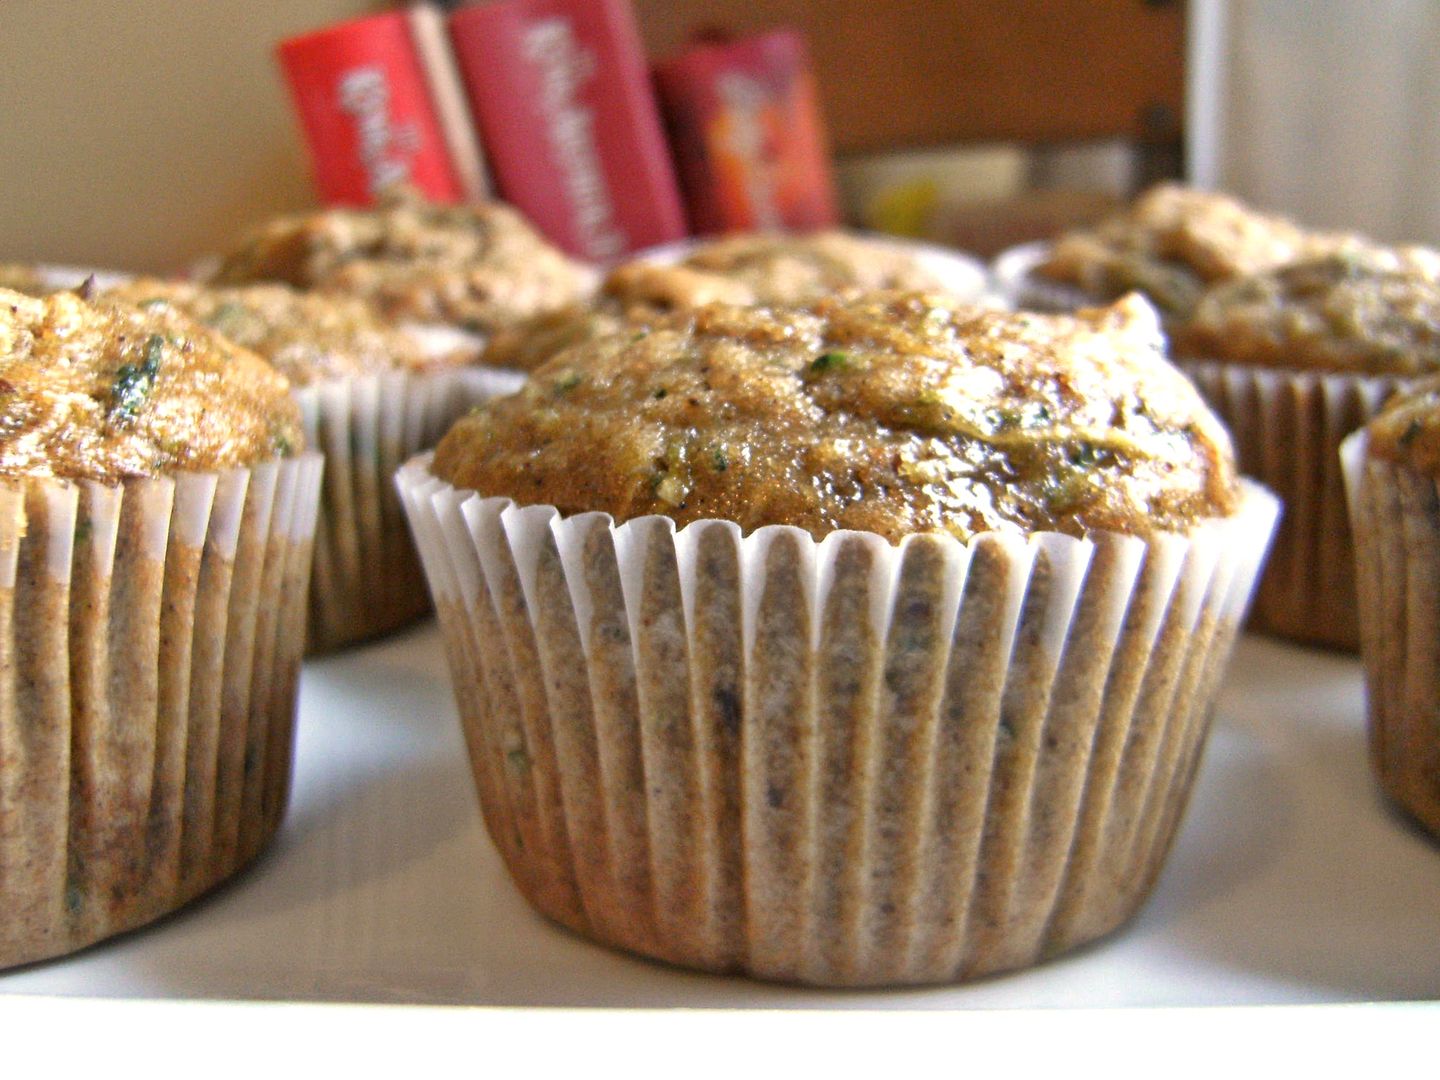
The recipe for the chocolate cupcakes (below) is so good...the cupcake are moist and light...perfect!


In Martha's book, the ladybugs are made from marzipan.  These I made from fondant that I had on hand.  And, I tried the Satin Ice fondant, although making it at home is easy, too.  The Satin Ice brand tastes great and smells like sugar heaven...it's nice to have on hand for fondant emergencies. ;) I found it at Sur La Table.  Either way you go, you'd use AmeriColor Super Red and Super Black food colorings to tint them.


One-Bowl Chocolate Cupcakes
{adapted from Martha Stewart Cupcakes}

3/4 c. dutch-process cocoa powder, such as Hershey's Special Dark
1 & 1/2 c. all-purpose flour
1 & 1/2 c. sugar
1 & 1/2 tsp. baking soda
3/4 tsp. baking powder
3/4 tsp. coarse salt
2 eggs
3/4 c. warm water
3/4 c. buttermilk
3 TBSP vegetable oil
1 tsp. pure vanilla extract

Preheat oven to 350 degrees. Line 18 muffin tins with cupcake liners; set aside.

With the whisk attachment of an electric mixer, whisk together cocoa powder, flour, sugar, baking soda, baking powder, and salt. Add eggs, warm water, buttermilk, oil, and vanilla, and mix on low speed until smooth, about 3 minutes. Scrape down the sides and bottom of bowl as needed.

The batter is very wet. Pour into a large glass measuring cup to easily pour into muffin cups.

Fill baking cups 2/3rd full of batter. Bake about 20 minutes until a toothpick inserted in the middle comes out clean and the tops bounce back when lightly pressed. Cool on wire racks 10 minutes, then invert and remove from pans.  Cool completely on the wire racks.

The frosting is swiss meringue buttercream, although you could use any frosting that holds its shape.  For a great post on SMBC (I hear that's what the cool kids call it), visit my friend Gail, over at One Tough Cookie.  Her recipe is delicious and she makes the process look so easy!

The buttercream was tinted green with AmeriColor Leaf and Forest Green food colorings and piped onto the cupcakes with a #233 Wilton tip.

*That grass frosting counts as a serving of "greens," right?*

Thursday, April 14, 2011

Bird's Nest Cupcakes . . . with speckled egg cookie toppers


I'm not sure why, but the idea for these little bird's nest cupcakes popped into my head one day.  I thought...wow, THAT is a really original idea.  And then, I saw these on my friend Callye's blog.  Speckled egg cookies AND anthro-inspired bunnies that are just incredible.

Oh well, so maybe speckled egg cookies aren't so original, but I really like seeing different people's methods for making things.  {Especially when it involves sugar.}

To make the cookie toppers, I just used a mini egg cutter and poked a toothpick in the dough before baking.  I always freeze my cookies for about 5-10 minutes before putting them in the oven, so that made maneuvering them with the toothpicks easy.

Once the cookies were cooled, I iced them with royal icing and let them dry overnight.

The next day, I mixed equal parts (or close to equal parts) AmeriColor Chocolate Brown food coloring with water.  (Similar to the method used to make "wood-grain.")
 
Then, with a child's paintbrush, I flicked the mixture onto the cookies.  
It was really, really fun!!!

If you have those speckled granite countertops, you are in luck.  You are about to add a few more speckles.

WARNING:  Do not wear white when doing this.  Do not let your kids see you flicking food coloring all over the kitchen with a paint brush.  If your kids DO see you, try to act like you're not having fun. ;)

Oh, and this is what you finger will look like afterward.  You know, gloves would not have been a bad thing.


OK...the cupcakes.  I'm gonna fess up.  I used a box.  A doctored up box, but still a box.  Hey....I made the cookies.

AND...(fessing up again)...I used canned icing.  Honestly, I LIKE canned icing.  I'm sorry, but it's true.

{Looking out the window nervously for the Food Police.}

The method for doctoring up a cake mix for cupcakes come directly from the book Hello Cupcake.

Use a box mix (I like Betty Crocker French Vanilla), replace the water with 1 cup buttermilk.  Use the same amount of oil and increase the eggs to 4.  Then, mix and bake like normal.

On top of the CANNED FROSTING, I used toasted coconut to make the nests.  Toasting coconut is easy.

Spread it on a parchment-lined cookie sheet and bake for 12 minutes, taking it out to stir frequently.

Frost the cupcake and sprinkle with coconut.
 
Add your cookies.


The love of canned frosting...am I alone?  Bueller? Bueller?

Sunday, January 30, 2011

Chocolate Chip Cookie Dough Cupcakes. . . . . yeah, you heard me.

Kiddo's birthday was last week and he LOOOOOOOOOOVES cookie dough.
{So does his mother...it's hereditary.}

I knew exactly what to make him for his birthday cake, Cheryl's Chocolate Chip Cookie Dough Cupcakes.


Let me break these bad boys down for you....

First, there is a chocolate chip cookie cupcake. Then, they are filled with chocolate chip cookie dough filling.  And finally, they are topped with a brown sugar cookie dough frosting.

{Yeah, you don't WANT to know the WW points on these puppies.}

For the cupcakes and the filling, I'm going to link you to Cheryl's printable recipe.  The only change I made on those was to add just a *pinch* of salt to the filling.  You could totally skip that if you wanted.

I changed up the frosting just a bit, so here is that recipe...

Brown Sugar Cookie Dough Frosting

3 sticks unsalted butter, room temp.
3/4 c. light brown sugar, packed
1 lb. box powdered sugar
1/2 tsp. coarse salt
3 TBSP milk
2 and &1/2 tsp vanilla
mini chocolate chips

Cream the butter and brown sugar with the paddle attachment until fluffy.  Add in the powdered sugar and beat on low until incorporated, then increase the speed and beat until smooth and combined.  Add the salt, milk and vanilla; blend until smooth.

Frost the cupcakes. (I used a Bakery Crafts 9CS tip.)  Sprinkle with mini chocolate chips.


Now, it's time for the candles.

And I have NO IDEA how this happened, but the reflection of the flames made ♥'s in the picture.  Is that cool, or what?!?!?


{Here's what 12 looks like around here.....sweaty hair, flared nostrils, fruit punch mustache and all. ♥}

Monday, December 27, 2010

Hoping you had a Holly Jolly Christmas!

 
Christmas!  It came and went!  But, I'm still celebrating because there are still CUPCAKES!!!

These are coconut cupcakes and they are delicious!  The cake, the frosting, everything!  They're from Ina, you know, the Barefoot Contessa.  Don't you wish you lived right next door to Ina?  I'd like to live right in between Ina and the Pioneer Woman with maybe Martha the next block over....I don't clean enough for Martha to live next door.

I trust Ina....and this recipe is no exception.  I've made them several times and make the recipe exactly as she writes it.  No tweaking, no modifying....it's perfect.
Here is the recipe for the coconut cupcakes and the frosting in their original perfect state from Ina. (I did use large eggs instead of XL, but that was all I had on hand.)

{Just to give you an idea of how good it is.....the frosting starts like this:
....with 3 sticks of butter and a pound of cream cheese. Yep, it's good.}

For the holly, I planned to make fondant, but December 25th kept getting closer and closer.  I saw marzipan on the grocery store shelf and decided to give it a try.

You guys....it was EASY!!!  Marzipan is basically ground almonds and sugar.  Inside the box, it comes wrapped in a tube.
I divided it and used my AmeriColor Gel Paste food coloring in Super Red and Leaf Green to color it.  (I put my hands in baggies while kneading in the color because I didn't have any gloves....and we were going to a Christmas party and I didn't want to scare anyone with red & green hands.)
To shape the holly berries, I just pinched off pieces of the colored marzipan and rolled it into balls.  For the leaves, I rolled out the marzipan and used a tiny maple leaf cutter. Then with a paring knife, made the leaves a little more pointy.  I used the knife to make veins in the leaves as well.
Once formed, the marzipan can be left out at room temperature.
I do hope you had a HOLLY jolly Christmas. We did...and this picture about sums it up...
{Have a favorite from your holiday baking? Or a favorite from someone else? Feel free to leave a link in the comments.}

Thursday, September 16, 2010

Gluten-Free Chocolate Cupcakes with Coffee Icing

Gluten free chocolate cupcake recipe with coffee flavored icing
Gluten-free chocolate cupcakes.

Gluten-free cupcakes are hot. Or should I say, HAWT. Tack on vegan status, too, and you've got a trend worthy of the most BoHo WeHo GoGo. So I'm reprising this chocolate cupcake recipe to tempt you into baking this weekend. These little beauties remind me of Devil's Food Cake. Dark, moist and chocolatey. So go grab your inner Domestic Goddess by the hand and stir up some trouble.

But before we get to (what happens to be my favorite) chocolate cupcake recipe from the archives, I want to share something. Maybe it's the waxing moon, that cyclic siren pulling us toward wholeness, to embracing our shadow, urging us to let go, shed the outworn for the sake of authenticity. Or maybe it's the fresh start of a new school year, possessing me with cravings for newly sharpened pencils and thick stacks of paper, clean as a cloud. Fall always wakes me up. It conjures images of new beginnings.

And yes, there will be baby pictures.


Continue reading

Saturday, June 26, 2010

Kiddo in the Kitchen : Zucchini Spice Cupcakes

Desserts for Dudes
I don't know about you, but when kiddo and I go to the farmer's market, our minds turn to big, farm-fresh salads cupcakes.  I'm pretty sure he chose this recipe so that zucchini I bought wouldn't show up on his dinner plate.

{Don't worry...I'll torture him with the tomatoes.}

The cupcake and frosting recipes come from Martha Stewart's Cupcakes. We halved the recipe (I really don't need 24 cupcakes sitting around the house). 

Zucchini Spice Cupcakes
{modified from Martha Stewart's Cupcakes}

1 and 1/2 c. all-purpose flour
1/2 tsp. baking soda
1/4 tsp. baking powder
1/2 tsp. coarse salt
2 tsp. cinnamon
1/4 tsp. freshly grated nutmeg
1/8 tsp. ground cloves
1/2 c. vegetable oil
1 egg, room temp.
1 and 1/2 tsp. vanilla
1/2 tsp. grated lemon zest
1 c. light brown sugar, packed
1 and 1/2 c. grated zucchini
1/2 c. walnuts, toasted and chopped

Preheat oven to 350.
Line a muffin tin with 12 paper liners.

Whisk together the flour through cloves.  In another bowl, whisk together the oil, egg, vanilla and zest.  Whisk in the brown sugar until smooth.

Stir in the zucchini.  Add the flour mixture just until combined; stir in the walnuts.

Divide the batter evenly between the cups.  Bake, rotating halfway through, about 20-24 minutes.  Cupcakes will spring back when lightly toughed in the center and a toothpick should come out clean.

Cool in the pan for 10 minutes.  Remove cupcake to a cooling rack and let cool completely.


{Aren't they pretty? I'm thinking we could stop here and call them muffins. But, we won't.}


Cream Cheese Frosting
1 stick unsalted butter, room temp.
6 oz. cream cheese, room temp.
2 c. powdered sugar
1/2 tsp. vanilla

Beat the butter and cream cheese on medium-high until fluffy, about 3 minutes.  Reduce speed to low, and1/2 c. sugar and vanilla.  Mix until smooth and combined.  Add the remaining sugar 1/2 cup at a time, beating after each addition until smooth.

Now it's time to frost the cupcakes...
Kiddo said he wanted to try piping instead of spreading the icing.
 
He did a really great job...and I couldn't get enough of watching him. 


These cupcakes are wonderful...moist and full of flavor.  And, you can never go wrong with cream cheese frosting!  We think you'll like them!

 The verdict?


Here...we saved one for you....


{OH! I almost forgot....there are a couple new videos over at University of Cookie.  Be sure to check how the method TidyMom uses to roll her cookie dough.  Genius!}